Many novice archers will simply visit their local archery store when their arrows need another fletching. But did you know you can do it at home with a fletching jig? It’s a pretty easy process, and you’ll soon have your arrows flying straight again.
To use a fletching jig, place the vane in the jig and carefully add glue to the base. With a fletching in the clamp, press the two together and leave for at least 30 seconds until the glue is set. Repeat the process for other arrows – or vanes if you’re using the big jig – and let the adhesive cure.
This article will give you a step-by-step guide on how to fletch your arrows using a jig. We’ll also cover how to properly clean your arrows for fletching and how to use a big jig.
How To Use a Fletching Jig
If you’ve decided to fletch your arrows yourself, you’ll need to get a arrow jig. Generally, they are affordable, but they can be expensive following a higher quality.
However, fletching arrows yourself can save you money (and time) down the road, especially if you’re pursuing archery long-term.
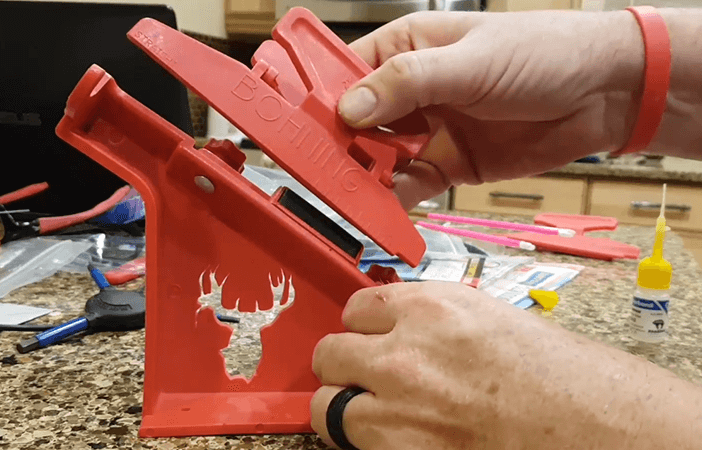
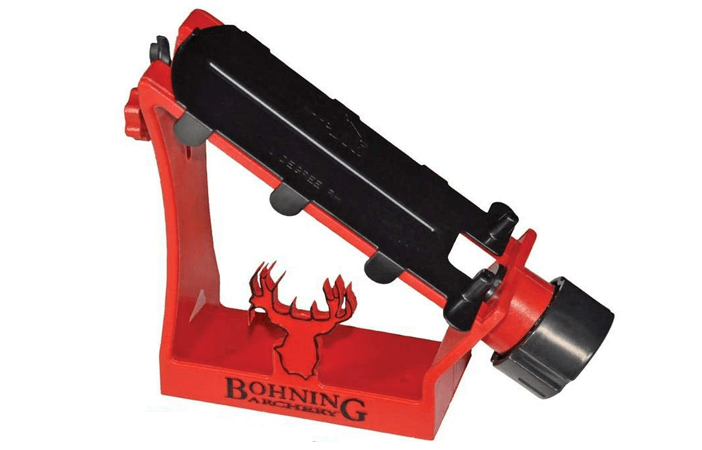
The Bohning 12962 Helix Tower is highly reviewed and comes in at under $60. However, if you’re new to the sport and are unsure of such a large purchase, the Bohning Pro Class Jig with Straight Clamp is a great option for half the price. Both can be found on Amazon.com.
To use a jig, apply an arrow wrap, like these Bohning 4-Inch Carbon Arrow Wraps or fletch directly to the surface of the shaft.
Adjust the jig accordingly to ensure you get the correct fletching alignment – newer models don’t require you to do this. Each jig will come with a manual for proper use, but we’ll go over some of the basics below.
Here are the steps for using a Bohning Helix Tower Jig:
Place the Shaft

Place the arrow shaft in the tower. This is in the center and will hold the shaft in place as you work.
Place the Vanes
Put your vanes into the fletching jig’s arms. There should be a guide to follow so you know they’re in the right spot.
Apply Glue
Apply a few dots of glue on each vane, running the tube tip along the vane base to ensure the arrow gets enough without creating a mess. Do this slowly and avoid using too much glue.
Place the Ring Over the Top
Lift the arms until the vanes make contact with the shaft and carefully slip the ring over the top. Use your index and middle fingers to push the ring down but avoid using too much pressure on the ring, which can cause all the glue to come off from under the vanes.
Let the Vanes Rest
Let the vanes rest for about 30 seconds. By letting the vanes rest, the glue will stick properly. You can let it sit longer if you like.
Tighten the Clamps
Remove the ring, open the tower base, and pull the clamps back. Congratulations, you now have a fletched arrow.
With a jig, the process of fletching your arrows is quite simple and it doesn’t take long to have your arrows ready to go. However, there are a few important steps that need to be taken before you can get to this point, such as cleaning the shaft.
How to Prepare Your Arrows for Fletching

Once you’ve purchased your fletching jig, make sure you also have other necessary materials and tools. You’ll also want the arrow shaft surface to be clean so you know the glue will stick.
Keep reading to learn how to do that.
Gather the Vanes, Stripping Tool, Jig, and Glue
Before you begin, it’s essential to have everything ready to go. The last thing you need is to have your shafts cleaned only to find you’ve run out of glue.
To do the fletching, you will need:
- Vanes (plastic vanes or genuine or synthetic feathers)
- Stripping tool
- Arrow jig
- Fletching glue (try the G-Lock Blu Glu, Bohning Platinum Fletch Tite, or Gorilla Super Glue from Amazon.com)
- Cleaning solution for arrow shaft
Be careful when handling the stripping tool to prevent injuries or your arrow shaft from getting damaged. Since you’ll be using glue, make sure your working space is well-ventilated and remember to wear gloves when handling the cleaning solution.
Remove the Fletchings and Clean the Shaft
Cleaning the fletchings is essential as this removes the old glue and gives the replacements a smooth surface. A clean surface will ensure the glue will work well.
Scrape off the adhesive using a stripping tool before getting the shaft cleaned. Be careful not to make the shaft sharp to ensure that the arrow is safe to shoot.
Use a cleaning solution of hot water and dish soap to clean the shaft and scrub it using the Scotch-Brite® pad before rinsing it off with hot water. Do this until all your arrow shafts are free from debris.
Allow the shafts to dry thoroughly before you begin applying any glue.
How To Use a Big Fletching Jig

If your vanes are longer than two inches, you’ll need to use a big jig instead of the tower jig. The Bohning 1320 Blazer Big Jig from Amazon.com is excellent for up to four inches.
Before fletching your arrows, make sure your arrow fits into the jig. They should have measurements and guides available before you buy so you’ll know if it’s the right size for your needs.
Unfortunately, this kind of jig only allows you to fletch one vane at a time, which can be time-consuming.
To use a big fletching jig:
- Place the shaft into the slot.
- Remove the plate and insert the vane into the jig’s slot.
- Adjust the position of the arrow to the height you want, and then apply the glue to the vanes.
- Line up the plate with the jig base and clamp it down for 30 seconds.
After 30 seconds, remove the plate and turn the jig’s knob counterclockwise towards the next notch. Repeat the steps for your other vanes, and once done, wait for the adhesive to cure.
Check out the video below for more details:
Final Thoughts: How Do You Use a Fletching Jig
Fletching arrows is easier than you might think and can save money and time if you do it yourself with a arrow jig. If you use smaller vanes, a tower jig is a great option. However, for vanes over two inches, you’ll likely need a big jig.
To fletch an arrow, you’ll need a fletching jig, stripping tool, cleaning solution, adhesive, and vanes. Apply the glue to the vane, and clamp it to the shaft until the glue sets.
Related Articles:
- Best Lighted Nocks
- Best Broadhead for Hogs
- Best Fletching Jig
- Vertical Pin Bow Sight Vs Horizontal Pin Bow Sight
- Single Pin Bow Sight Vs Multi Pin Bow Sight

