If you’ve never mounted a rifle scope, it might seem a bit intimidating. There are a lot of parts and tools required to secure a scope, depending on which company you choose and which firearm you’re pairing it with. The good news is we have the step-by-step process to mount any scope on your favorite rifle.
To mount a scope, attach the scope base to the rifle, then screw the lower rings to the base. Lay the scope in the brackets, rotate the scope until it’s aligned, then secure the top rings to clamp the scope. Make your adjustments and zero the scope as soon as possible to prevent it from loosening.
This article will also teach you the following information about mounting a scope:
- Simple instructions to mount a scope to your rifle
- Unique tips and tricks to make it go as quickly as smoothly as possible
- How to zero the scope once you’ve mounted it
Install the Scope’s Base
Most modern rifles come with a scope base pre-installed, but you might have to change it or add one if it’s not there. Fortunately, attaching a scope base is relatively straightforward.
They come with all of the necessary mounting hardware and instructions, so you should be able to complete the installation of your rifle scope in less than five minutes.
Check Your Rifle for a Scope Base
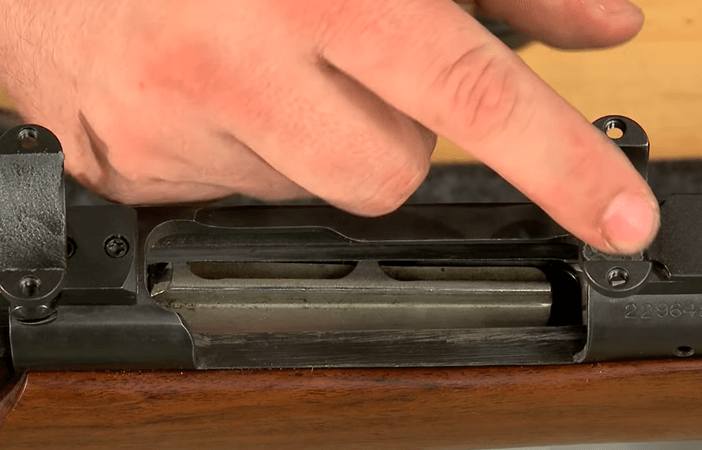
According to Outdoor Life, very few scope bases aren’t installed at the time of the purchase.
However, you might have to mount the scope base before mounting the scope. Use the screws that come with the scope base, align it with the rifle, and check your work. It’s important to get a base that’s suitable for your rifle.
Clean and Oil the Scope Base
Lubricating the scope’s base will prevent rust, grime, and corrosion that could ruin the rifle and scope. Use gun oil to get the job done.
Even if your rifle comes with a pre-installed scope base, it doesn’t hurt to use oil or another lubricant to prevent long-term corrosion. It’s much easier to prevent it than to remove it.
Use a Leveler Tool
Some scopes and bases come with built-in levelers (the small green bubble type). Place a leveler alongside the scope’s base to ensure it’s flat and flush with the rifle.
If it’s slightly loose or misaligned, it’ll ruin the whole scope mounting process. Remove the base and redo the leveling process until it’s as level as possible.
If your rifle comes with a pre-installed base or you’ve finished the steps found throughout this section, you’re ready to mount the rings and scope. In the next section, we’ll break down a simple trick to quickly and accurately attach the bottom rings.
Attach the Scope Rings to the Base
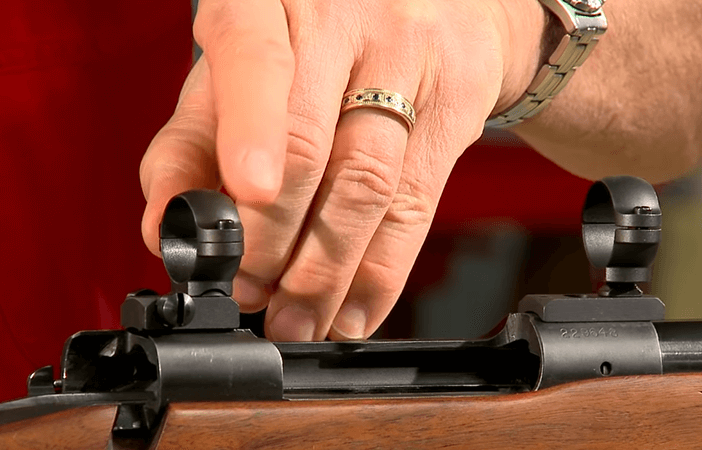
All scopes are mounted using rings, though there are two types of rings we’ll break down below.
When you buy a scope, it’d be best to see if it’s compatible with your rifle’s mounting system since they’re not all the same style. Getting an incorrect ring set can make it virtually impossible to use with your rifle.
Here’s how you can attach the scope rings to the base:
Choose Between Two Types of Scope Rings
Some scope rings drill into the rifle scope’s base, while others wrap around a mounting system.
The latter choice is the most common variant, so we’ll stick with its instructions for this section. If you have the first variant, simply drill the screws into the base and follow steps 3 and 4.
Tighten the Scope Rings With a Wrench
The AUTLEAD Torque Wrench is an excellent choice since it comes with plenty of attachments, hardened steel, and more than enough variations for various rifle scopes.
You can use it for rifle scope bases, lower ring brackets, tighten the ring screws, and more.
Test Their Level to Ensure They’re Flush With the Scope’s Base
You could use a leveler tool, such as the one from the previous subheading. However, several scopes, bases, and rifles have built-in levelers you can use to install the bottom scope rings in a few seconds.
Inspect the Spacing With Your Scope
Many scope brackets have several slots, so you’ll have to make sure they’re wide enough to support the scope. Inspect the spacing with your scope, so that you know how far they need to be.
Measure the bracket, scope, and rings to get an accurate distance between the two lower rings.
Once you’ve attached the scope rings, the rest of the process is very easy. The brackets and base are the most influential part of the process because they dictate the level and spacing of the rifle scope. When you’re ready to set the scope, read on.
Lay the Scope in the Secured Rings
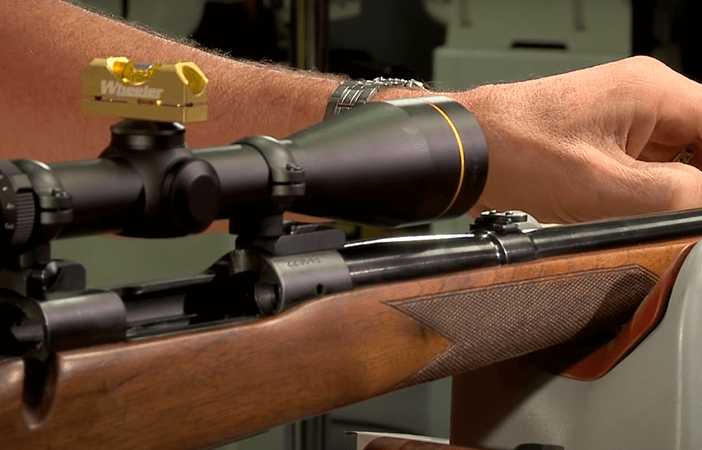
Many beginners make the mistake of laying the scope on the bottom brackets and securing the top rings without rotating the scope to its proper position.
Making this common mistake will make the crosshairs misaligned or facing the wrong direction. You don’t need any other tools aside from a level tool and your eyes to check the scope.
Follow these suggestions to place the scope properly:
Place the Scope on the Rings
Place the scope on the rings, ensuring it’s not slanted or misaligned. Scope rings are designed to hug the scope, preventing it from moving left or right.
Without the top rings, it’ll move upward, but we’ll fix that issue later in the article. If the scope doesn’t have any wiggle room left or right, you’re good to go.
Rotate and Align the Scope
Rotate the scope, so the windage and elevation knobs are aligned. Most rifle scopes have a windage knob on the left or right of the scope, whereas the elevation knob is on top of the scope.
They should be positioned at a 90-degree angle, so it sits flush with the rifle base.
Check the Crosshair to See if It’s Placed Properly
If you’ve aligned the windage and elevation knobs, it’s very unlikely the crosshair will be misaligned. However, now is the time to find out if there were any manufacturer defects.
Look down the scope to view the crosshair to prevent it from rotating. So that, you get your scope with perfectly vertical crosshairs alignment.
Lay Down and Look Through the Sight
Lay down and look through the sight to make sure it suits your preferences. Use the scope as you would if you were shooting downrange or hunting.
This step is the last time you can review the scope’s rotation without taking it apart, so it’s crucial that you take your time before sealing it.
Vortex Optics explains you can tighten the bottom rings a bit if you want to secure them before adding the top rings.
Position the scope now. You should feel snug in the bottom brackets prior to screwing the upper portions. It should also be centered for aesthetic purposes.
Mount the Top Scope Rings
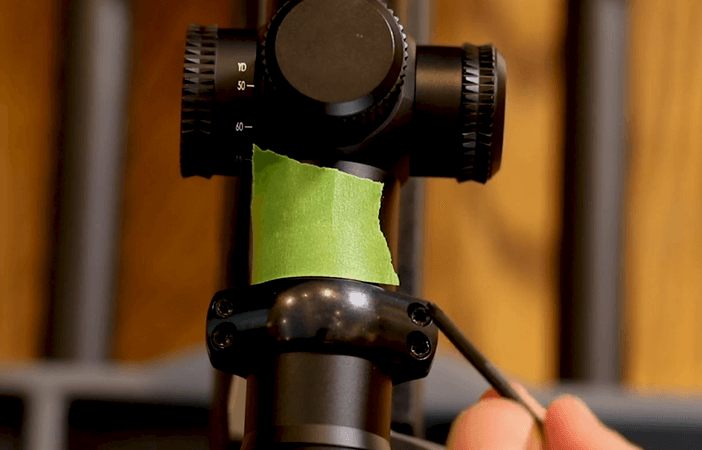
The top rings align with the bottom rings to hold the scope, which is technically the final part of the process.
We’ll also cover how you can make the scope more comfortable and tips to zero it once the scope is mounted. Attaching the top brackets requires a screwdriver (some require a Phillip’s head, while others need a flathead).
To mount the top rings, go through these four steps:
Coat Each Screw With Loctite
Coat each screw with Loctite to prevent it from loosening. Loctite lets you secure screws without them slowly loosening over time. It’s a great way to keep your scope in good condition for many years to come.
Keep in mind it’ll be quite difficult to remove them once you apply Loctite, so ensure you’re satisfied with the results immediately.
Align the Rings Around the Scope
Align the rings around the scope before screwing them together. Both rings should cover the top of the scope without a gap.
The screw holes should also be aligned, allowing you to screw them together without pushing them to the side or stripping the screw.
Drill the Screws Simultaneously
Drill each screw 80% of the way until all of them are in place, then go the rest of the way. Never drill them all the way and completely secure the ring screws before each screw is in place because you might have to make minor adjustments.
This process lets you keep each screw vertical without tilting them in either direction. Finally, check the scope’s position and tighten the ring screw.
Tighten the Scope
Wiggle the scope to check if it’s tight enough. If it’s loose, you need to check each of the rings and screws to locate the problem.
If everything is secure, but there’s a bit of wiggle room, you might need to contact the manufacturer for replacement parts. Your scope shouldn’t move, not even a centimeter!
That’s all you have to do to mount your scope! It’s fairly easy if you have all of the right parts and follow the previously mentioned steps. If you want to take it a step further and make it more comfortable and ready to use, you’re in luck!
Adjust Eye Relief
Now, lay scope in the rings. Replace the top half of your rings and tighten screws lightly to hold them together with a gentle but firm grip.
Take the rifle out of the setup and hold the rifle as you naturally would when aiming in a real-life situation.
Adjust this by either moving forward or backward on where you put the scope’s eye relief zone while still feeling like there is no pressure building up behind your eyes.
Moving the scope forward or backward as necessary to adjust eye relief. Positioning it far forward while still being able to see a clear picture (with no black around the edges). Remember: move the scope, not your head to adjust eye relief.
Ensure the Scope Fits Comfortably
Your scope is mounted, but it might feel a bit uncomfortable to use for various reasons. Beginners or those trying new scopes will have to go through a quick process of getting a feel for the scope’s dimensions.
We compiled a few suggestions of things you could try to familiarize yourself with a new rifle scope.
Look Down the Scope
The first step is to lay down (or stand up, depending on how you typically shoot) and see if it’s positioned correctly.
You should be able to rest your cheek away from the scope and look down the crosshair without feeling like you’re too close or far away. This step is partially positioning with a bit of proper mounting techniques.
Check the Scope From the Side
Are the adjustment knobs positioned correctly? Does the scope sit in the middle of the rifle, or is it too far in one direction?
Be extra critical while analyzing your scope to ensure you’re happy with the results.
Take It for a Test Run
Zero your scope with the instructions in the next section, then take your rifle to the range and see if you like your new scope. If it’s mounted correctly, you’ll have no problem nailing each shot comfortably.
Zero the Scope As Soon as Possible

Zeroing your scope as soon as possible will make your new scope ready for action. Now head to the range or the field to have a look at the field of view. Try the tips below for the best results.
Take a Few Shots to Get an Accurate Grouping
Shoot between three to five times, then circle the grouping to ensure it’s narrow enough to move to the next step. If they’re too wide or pointed in a specific direction, you should make the necessary adjustments.
Adjust the Windage Knob
The windage knob is on the right or left side of the scope. If you shot too far in one direction, twist the windage knob in the opposite direction. Small adjustments make a big difference, so make sure you don’t overcompensate.
Change the Elevation Knob
Much like the windage knob, a short turn will make a world of difference. The elevation knob corresponds with the up or down trajectory of your shots. Switch it up for low shots and down for high shots.
Fire a Few More Times to Check the New Grouping
Repeat the previous three steps until you have the desired results. Make sure you use a new sheet of paper, so it’s not mixed with other groupings.
Zero the Rifle for Numerous Distances
Once you’re done with the initial zeroing, the remaining distances will be much easier to handle. Preferably, your scope should be zeroed to the distance you usually hunt at.
Now that you know how to mount a rifle scope, choose the best one for your hunting rifle from here:
Conclusion: How to Mount a Scope
To recap:
- Use Loctite or a similar product to secure the screws, preventing them from loosening.
- Work slowly to prevent loose parts of stripped screws.
- Make the necessary knob adjustments as soon as possible for the best results.
Mounting a rifle scope is much easier after you have the first installation under your belt. There’s no reason to spend too much time fidgeting with the rings and finding the picture-perfect setting. Your scope should rest easy, so it does most of the work if you have the right scope base for the rifle.
More Rifle Scope Related Articles:
- How Rifle Scopes Are Made
- What Is a Custom Turret and Do You Need One
- How Fragile Are Rifle Scopes
- Why Do Some Rifles Have 2 Scopes
- How To Clean Microfiber Cloth for Rifle Scopes
- What Is a 30/30 Reticle on Rifle Scopes

