Riflescopes can be tricky, especially if you’re not an expert marksman. Mounting the scope is half of the battle, but zeroing the sights can be a big issue for those who’ve never done it before. The good news is that regardless of which brand you’ve chosen, the steps to zero a rifle scope are almost always the same.
To zero a rifle scope, mount it on the rifle, adjust the eyepiece for clarity, then fire three to five shots at a target. Draw a circle around the area of the shots you fired and head back to your rifle. Adjust the knobs to narrow the shot and repeat the process until it’s hitting where you shoot.
Throughout this article, we’ll also cover the following details about how to zero a rifle scope:
- The step-by-step method to zero any rifle scope as quickly as possible.
- Common mistakes people often make along the way.
- How to zero a scope for the most common distances.
Mount the Rifle Scope for Zeroing
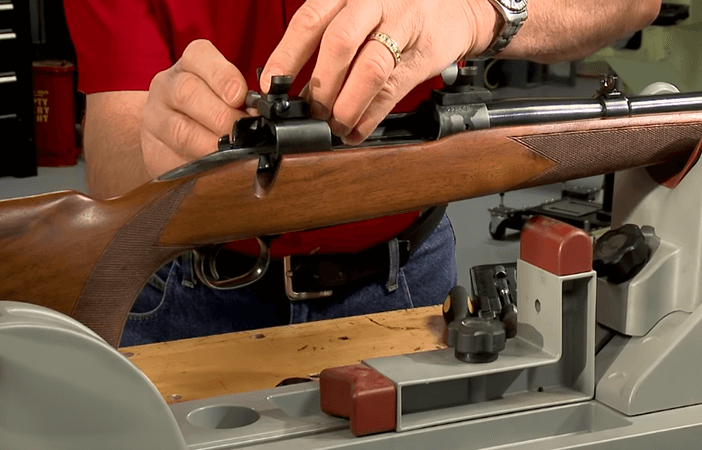
It’s nearly impossible to zero a scope without attaching it to the rifle. The good news is mounting the scope is much easier than it sounds. You should have two brackets, each with a lower and upper section and screws to secure the scope to the rifle.
Let’s break down the step-by-step process to mount a rifle scope for zeroing:
#1 Mount the Lower Bracket
Mount the lower bracket (also known as the base) on the rifle. You should start by attaching the lower brackets on the top of the rifle. They’re half-circles that lay flush with your rifle’s scope and you should be able to set the scope in the brackets smoothly.
#2 Rotate and Set the Scope
Lay the scope in the lower bracket and rotate it until it’s faced properly. Once the base brackets are screwed onto the rifle, set the scope in both brackets, ensuring it isn’t tilted or pushed too far forward or backward.
Rotate the scope so the elevation knob is facing up and the windage knob is facing to the right or left.
#3 Secure the Top Bracket
Secure the top bracket over the scope and screw it in place. When you’re happy with the knobs’ orientations, place the second set of half-circular brackets over the scope.
Drive the screws through the brackets, forming two full circles around the front and back of the rifle scope.
#4 Make Adjustment and Tighten It Up
Make minor adjustments until the riflescope is mounted and tightened. Sometimes, screwing and rotating can make things a little misaligned.
Take this time to slightly loosen and tighten the screws, brackets, and scope until you’re content with the appearance and layout.
#5 And You are Done!
Ensure you have easy access to all of the knobs. Most rifle scope brands make it easy to place the scope on the rifle with the knobs bulging from the top and sides. They shouldn’t be slanted. Use a leveling tool to ensure the scope is flat against the rifle; then you’re good to go.
If you’re ready to learn how to adjust the eyepiece and zero your scope, proceed to the next section.
Adjust the Rifle Scope’s Eyepiece
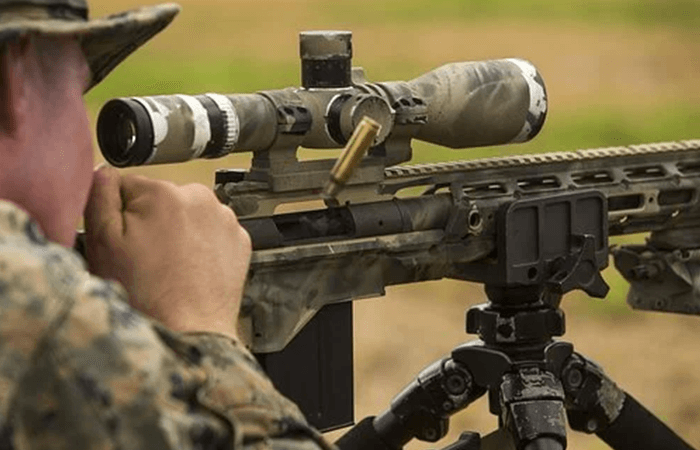
Changing the eyepiece should be done as soon as possible to prevent mistakes while zeroing the scope.
It’s debatably one of the most crucial parts of the process since it clarifies the sight and lets you see where you’re shooting. Much like mounting the scope, adjusting and fixing the eyepiece is as easy as it gets.
Here’s what you should keep in your mind when focusing the scope:
Rotate the Eyepiece to the Left or Right
The best way to focus the eyepiece is to start by turning it as far as you can in either direction. It’ll get extremely blurry, but there’s no point in focusing a sight without having a starting edge.
Slowly rotate the lens in the opposite direction until it gets clear enough to see through.
Treat the Rifle Scope’s Eyepiece Like a Camera Lens
Focusing a rifle scope’s eyepiece is much like looking through a camera or binoculars: you have to go back and forth until you find the perfect adjustment.
What’s clear to you might be a bit blurry to other people, which is why you might have to change it every time you hand it to your buddy. Keep a coin on hand whenever you want to change the knobs, too.
Keep Your Eye a Few Inches Back
Never shoot your rifle or zero the scope with your eye pressed against the scope. You’ll risk severe injuries, so it’s not worth it.
When you’re fixing the eyepiece, your eye should be a few inches back to simulate what it’s going to be like when you’re hunting or target practicing. Sitting too close or from the scope will alter the results.
As you can see, the eyepiece is simple yet essential to your success. Zeroing the rifle scope is nearly impossible without starting on the eyepiece, so it should be near the top of your to-do list. When you’re ready to fire the rifle and group the shots, read on.
Set the Zero With a Shot
If you’ve mounted the scope on the rifle and focused the eyepiece, you’re ready to shoot the rifle to create groupings.
Head to the range, decide how far you’ll shoot, and set a broad target paper with a bullseye. You should have a center point to aim at so you can fire at the same spot every time.
Follow these suggestions:
First Shots
Sit about 50 to 100 yards (45.72 to 91.44 meters) away from the target paper or however far away you intend to hunt from.
Zeroing your scope at different distances will have varying results, so it’s important to choose the distance that’s most similar to your hunting preferences. However, most people start between 50 to 100 yards or (150 to 300 feet).
Fire three to five more shots at the same location (preferably the center of the target). One shot isn’t enough since it won’t let you find an accurate grouping.
Take your time and shoot the target a handful of times, always aiming at the same spot. The goal is to know if the shots are going too far in any direction.
Account for the Environment
Account for wind, rain, and other natural elements. Keep in mind you’ll have to deal with the weather when firing at an outdoor range.
Considering the distance, volume, and power of most rifles, there’s a very slim chance you’ll ever use them indoors. We’ll dive into the details about using knobs to adjust windage and elevation later on the page.
Spend about 10 to 20 seconds waiting between each shot. Let yourself regain your breath.
Breathing techniques are quite impactful when it comes to firing and zeroing a rifle. If you shoot too quickly, you won’t have time to focus, breathe, and shoot. When you have between three to five (or more) shots fired, check the grouping.
Analyze Your Shot Groupings
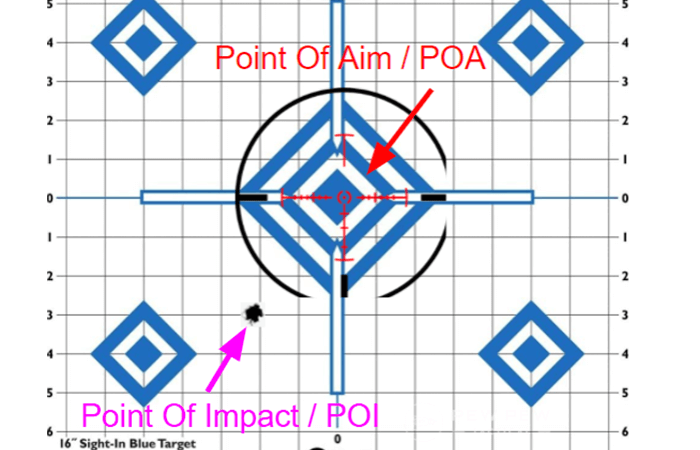
You will be surprised to see, how easy it is to analyze your groupings while zeroing a rifle scope.
The grouping is the area in which all of your shots are found. The narrower the grouping, the better your shots were, and the quicker it’ll be to zero the scope.
Different components, such as wind, elevation, scope mounting, eyepiece and reticle focusing, and breathing techniques can alter the results.
Here’s the four-step process to analyze your grouping after taking a few shots:
Ensure Nobody Else Is Shooting
Make sure nobody else is shooting, then retrieve the target to analyze it. If you’re alone at the range, you won’t have to worry about other riflemen.
It’s always better to be safe than sorry, so check the area before grabbing the target. It should be a piece of paper so you can use a pen or pencil for the fourth step.
Check the Distance Between Every Bullet Hole
If they’re spread far apart, you either need to practice your firing technique, breathing pattern or make various adjustments to the elevation, wind, and eyepiece knobs.
You should do your best to have a narrow grouping. If you hit the same spot with each shot, you’re quite accurate!
Measure the Drop or Rise From Hole to Hole
If your shots are hitting below, above, or off to the side, you’ll know which knob needs to be adjusted.
For example, anything too low needs an increase from the elevation knob. If it’s going left or right, change the windage knob. Keep in mind your firing technique impacts the grouping, too.
Draw a Circle and Encompass Them
Draw a circle around all of the holes, ensuring you encompass all of them without going outside the furthest shots.
Circling your shots will let you see how narrow it needs to be, whether it went too far in a specific direction or if you’re good to go. You’ll likely have to check your grouping a few times throughout the process.
Make Adjustments to Zero the Rifle Scope
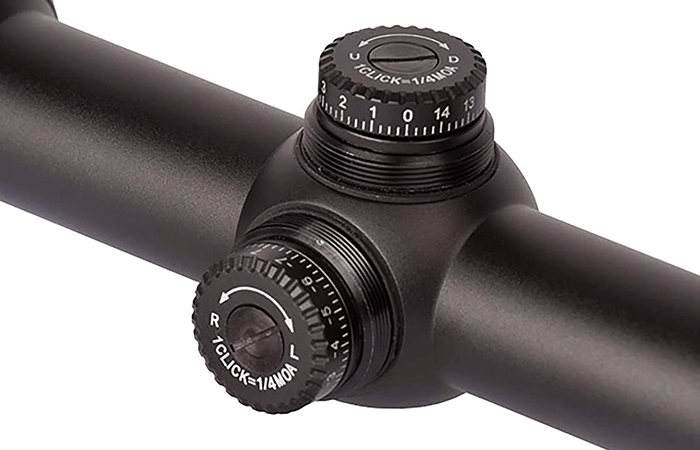
Minor adjustments go a long way when you’re zeroing your rifle scope. Many people believe grouping and adjustments are the most impactful steps. You’ll have to group, adjust, and group again until you’re hitting the target every time.
So, what adjustments will you need to make?
Level the Crosshair
Many rifle scopes have a knob or slot designed to change the crosshair. You can use a coin to change the level, as mentioned earlier in the article.
Work slowly since most scope crosshairs react quickly to sudden changes. The crosshair should rest perfectly in the middle of the scope when you’re looking down the sight.
Related reading: How To Mount a Rifle Scope With Perfectly Vertical Crosshairs?
Adjust the Elevation Knob
The elevation knob is typically on top of the rifle scope but refer to the manufacturer’s instructions if you’re having trouble locating it.
Much like the crosshair, you’ll have to work with small adjustments. Turn it a bit to accommodate the drop or rise of your shots taken in the previous section.
Change the Windage Knob
The windage knob is usually on the right or left side of the scope. If your shots are going too far in a direction, change the knob to the other direction.
Take your shots, test your grouping, then adjust for the difference. Moving these knobs takes a little while, so don’t expect to get it perfectly on the first attempt.
After you’ve adjusted the scope’s knobs and crosshairs, go back to the target, shoot five times, and circle your grouping. The point of impact starts at the starting position if you need to adjust your scope.
Always use a fresh sheet of paper without any bullet holes, so you don’t mix the groupings.
That’s all there is to it! For more info about zeroing your scope for various distances, accounting for wind and elevation, or using a bore sight, continue reading.
Zero the Scope for Various Distances
Zeroing a rifle scope isn’t too challenging once you’ve completed the initial steps. However, various distances require further adjustments.
You can’t expect to zero it once and be ready to shoot from any range. Fortunately, we’ve compiled a list of suggestions to make it easier for you to zero the rifle scope whenever you want to.
Zero Your Scope for Short Distances
Short-distance shooting is often much easier because there are fewer forces affecting the shot. Scope zeroing can be done for 100 yards, even at a 25-yard distance.
This can be achieved by setting your point of impact lower than 25 yards distance. You need to adjust a lower adjustment of .5” – 1.5”.
For example, if you’re shooting from 25 yards, (75 feet) the bullet won’t have enough time to drop too far or head left or right from heavy winds. There will be a slight difference, but not too much.
Make the Necessary Adjustments for Long-range Shooting
The longer your shot is, the more it’ll be impacted by prevailing elements. Anything over 100 yards (300 feet) will drop or sway in either direction if there’s a lot of wind, rain, or other weather patterns.
All bullets drop, so elevation adjustments are inevitable with long-distance zeroing.
Learn How to Quickly Zero Your Scope While Hunting
Eventually, focusing the eyepiece will only take a few seconds, and changing the windage and elevation knobs will work on muscle memory.
Practice resetting and zeroing your scope repeatedly so you’ll be ready to make new alterations when you’re out in the field.
Consider Having a Friend Calculate Adjustments on the Fly
If you have a spotter, you don’t have to worry as much about zeroing your scope for wind and elevation.
They can use another scope to figure out how far off your shot was, then let you know which adjustments you need to make before firing again.
Consider Using a Laser Bore Sight to Zero the Rifle
Laser bore sights can improve your zeroing experience by showing where the bullet should hit.
If you hit away from the laser sight, you’ll immediately know what needs to be adjusted and by how much. Using one of these sights will accelerate the process and zero your scope in no time.
What Advantages Do Laser Bore Sights Have?
Bore sights make it easier to see where you’re shooting. Rather than solely relying on your crosshair, you can check where the bullet should hit.
The laser’s location will be a clear indicator of any necessary adjustment, taking the guesswork out of the process and making the results more reliable.
They help you measure windage and elevation changes. If you shoot too low, high, or wide, you’ll immediately know the direction.
Many people are able to zero their rifle scope with a laser bore sight without circling their grouping or leaving the shooting area of the range.
You can use bore sighting to drastically reduce the time it takes to zero your rifle scope. Many inexperienced riflemen spend between 20 to 30 minutes zeroing their scopes, but a laser bore sight can cut that time in half.
Whether you’re short for time or want to breeze through the process, a laser bore sight works for everyone.
Most bore sights work for whichever distance you need them for. You don’t have to get a new bore sight for each distance, saving a lot of time, money, and energy.
As long as you have a decent laser sight, you can zero your rifle scope at virtually any distance.
Accounting for the Drop and Wind
Lastly, always expect the unexpected. If you zero your scope on a windy day, you’ll have to make minor adjustments to the windage knob next time you hunt or practice on a day without wind.
There will always be necessary changes, but all of them are significantly easier once you get the initial zeroing session out of the way.
Long-distance shooting will always add more drop, whereas short-distance shooting isn’t as impactful on the zeroing process.
Conclusion: How To Zero a Rifle Scope
Now that you know how to zero a rifle scope, you don’t have to worry about missing your shots.
You can make minor adjustments while hunting or aiming at targets to keep the scope zeroed for a long time before you have to redo the process. Ensure you always have the rifle scope zeroed for the proper distance.
Here’s a rundown of the post:
- Use a coin to make quick adjustments to your rifle scope.
- Take between three to five shots to form a grouping before zeroing the scope.
- Applying a boresight can make it much easier to hit your target.
Related Articles:
- How to Mount a Scope? Install a Rifle Scope Correctly
- How Rifle Scopes Are Made
- Why Are Rifle Scopes So Expensive? Are They Worth It
- What Is a Rifle Scope and Why Do I Need One

